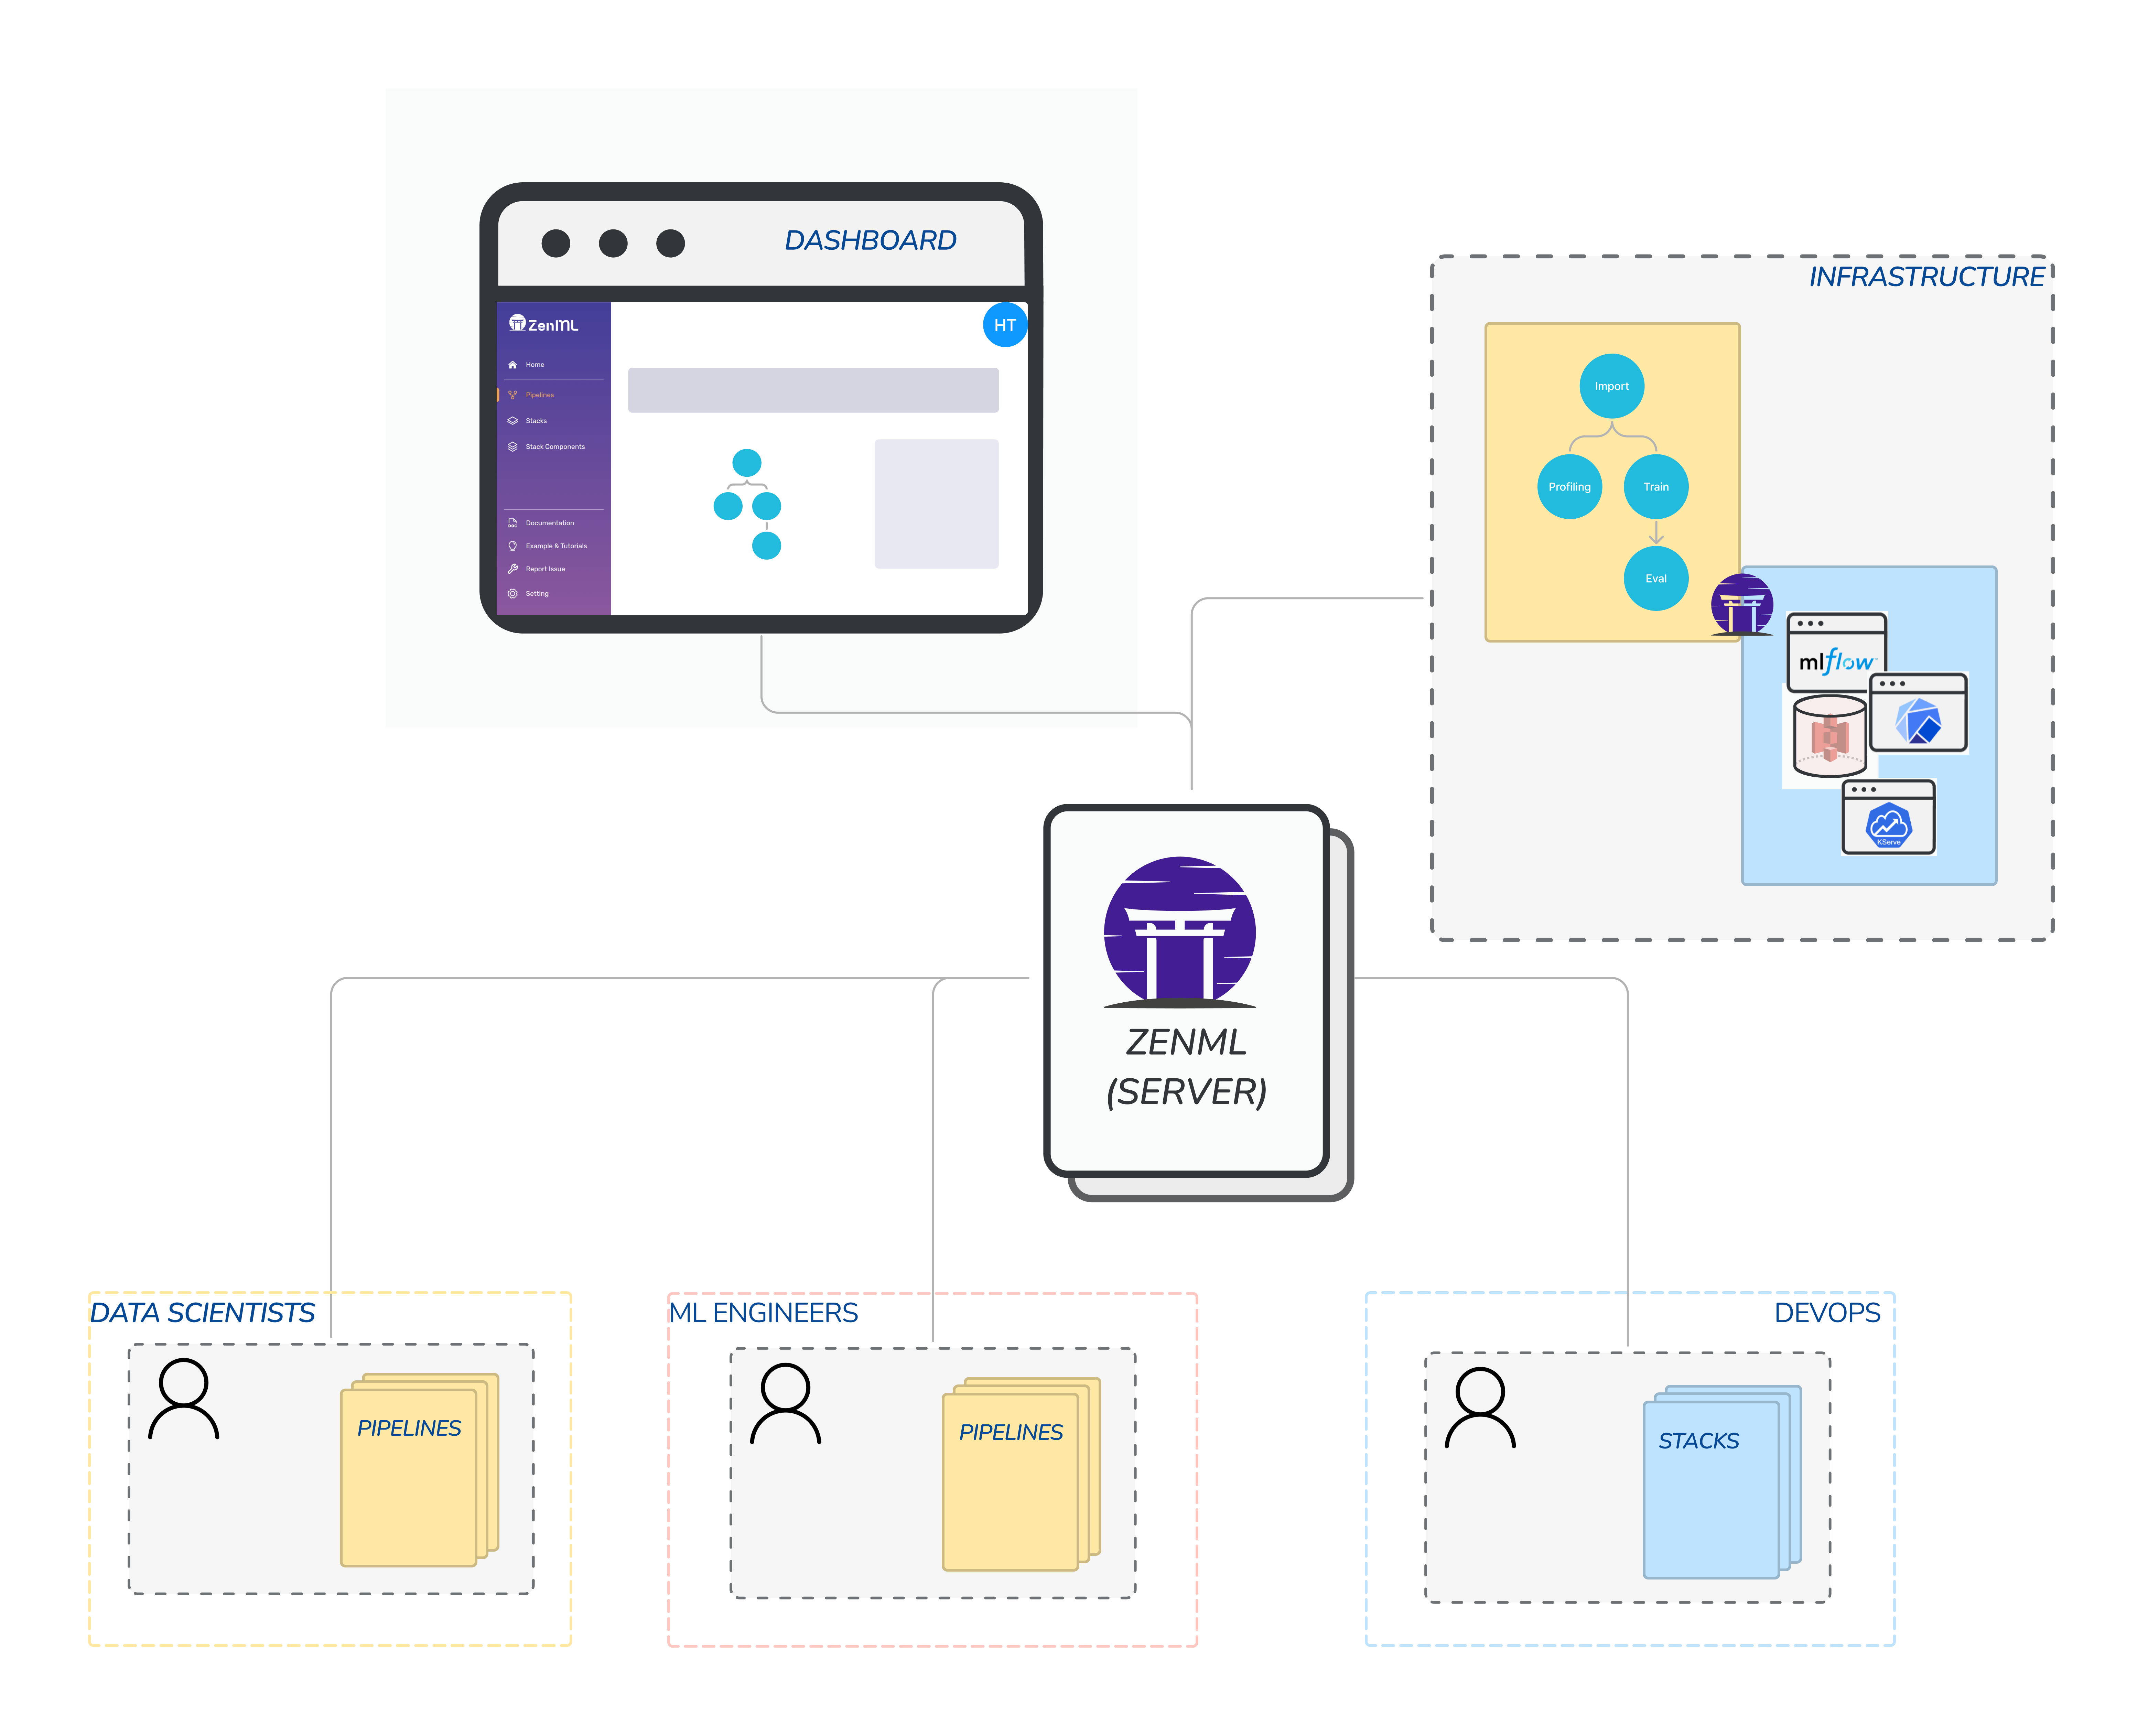
The ZenML Server is a distributed client-server ZenML deployment scenario in which multiple ZenML clients can connect to a remote service that provides persistent storage and acts as a central management hub for all ZenML operations involving Stack configurations, Stack Components and other ZenML objects.
A typical organization scenario with ZenML is to have Data Scientists or ML Engineers write pipelines, while the DevOps Engineers help them provision and register stacks. Typically, one can go through a CI/CD workflow to run pipelines on various different stacks.
Working with a ZenML Server involves two main aspects: deploying the ZenServer somewhere and connecting to it from your ZenML client. In this section, we will learn about the simplest way to deploy ZenML with the CLI, but there are other similarly easy options available.
Deploying with the CLI
The easiest and fastest way to get running on the cloud is by using the deploy CLI command. It currently only supports deploying to Kubernetes on managed cloud services.
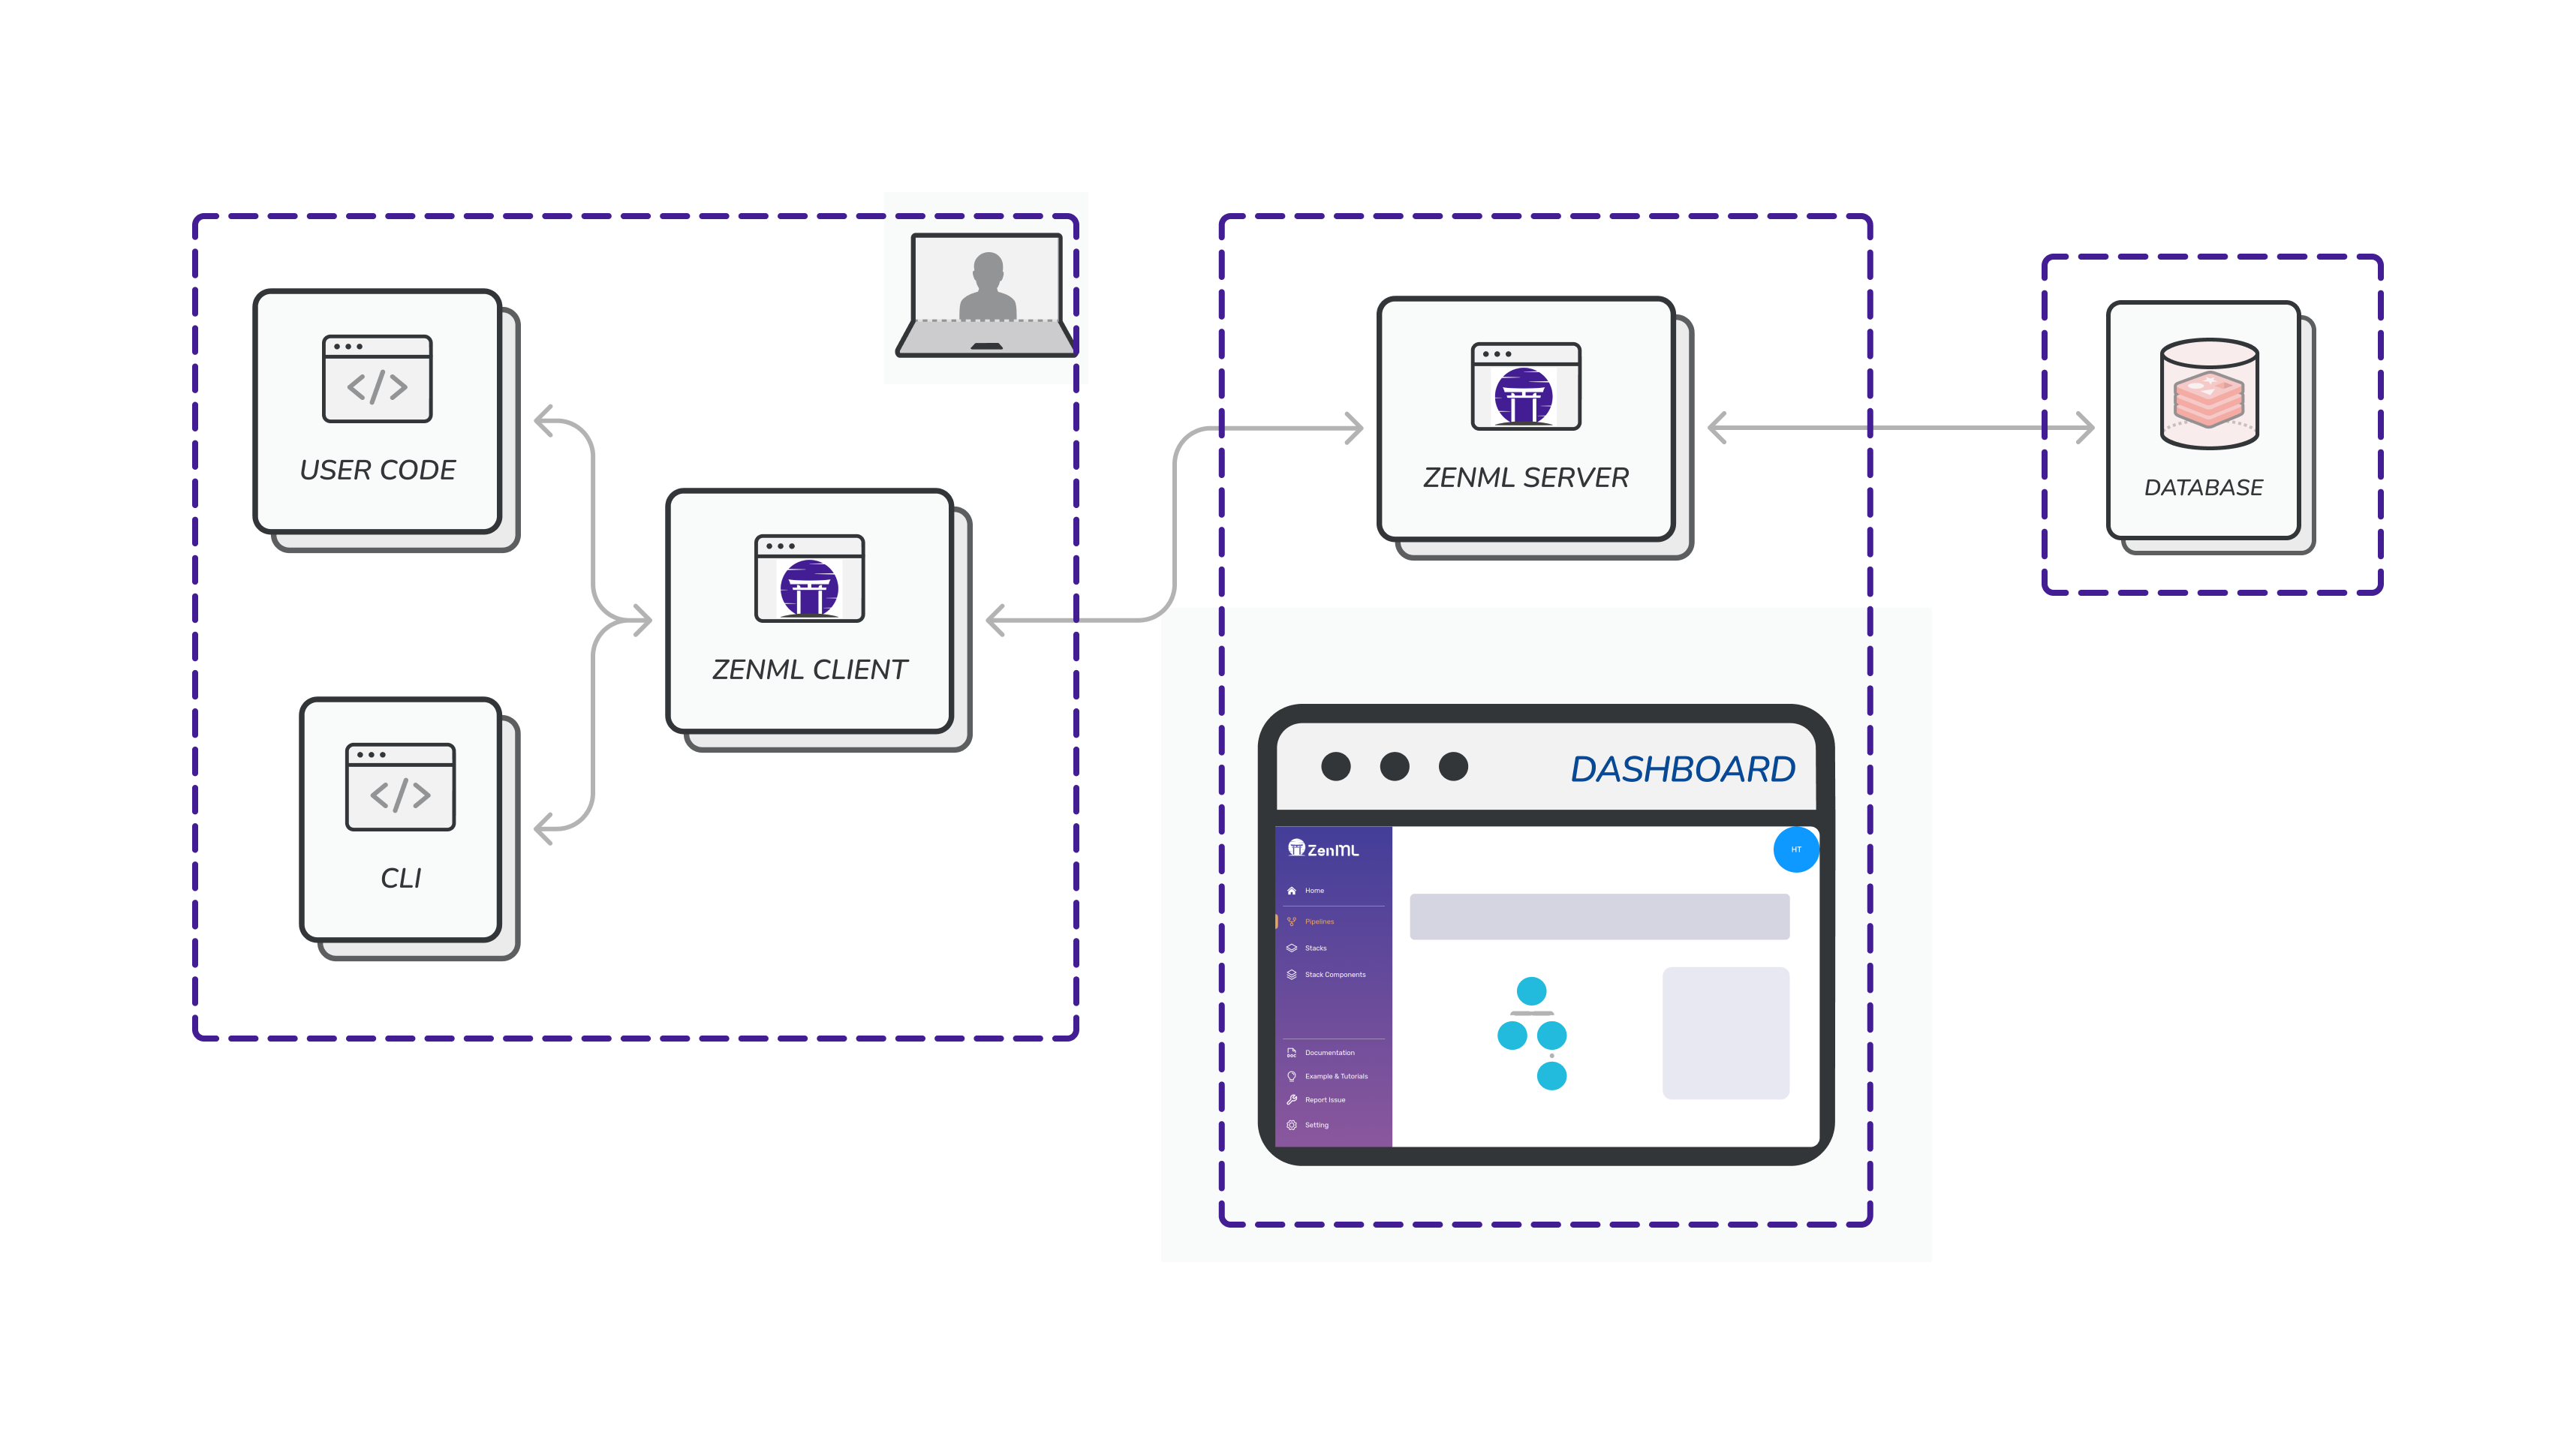
Before we begin, it will help to understand the architecture around the ZenML server and the database that it uses. Here is an illustration:
If you don’t have an existing Kubernetes cluster, you have the following two options to set it up:
- Creating it manually using the documentation for your cloud provider. For convenience, here are links for AWS, Azure and GCP.
- Using stack recipes that set up a cluster along with other tools that you might need in your cloud stack like artifact stores, and secret managers. Take a look at all available stack recipes to see if there’s something that works for you.
Once you have created your cluster, make sure that you configure your
kubectl client to talk to
it. If you have used stack recipes, this step is already done for you! To be able to run the deploy command, you should have your cloud provider’s
CLI configured locally with permissions to create resources like MySQL
databases and networks.
zenml deploy command, then read option 2 here.
If you have trouble with the zenml deploy command and are stuck at this
point, please join our Slack community and
send a message to the #general channel. The community is more than willing to
help out.
- A
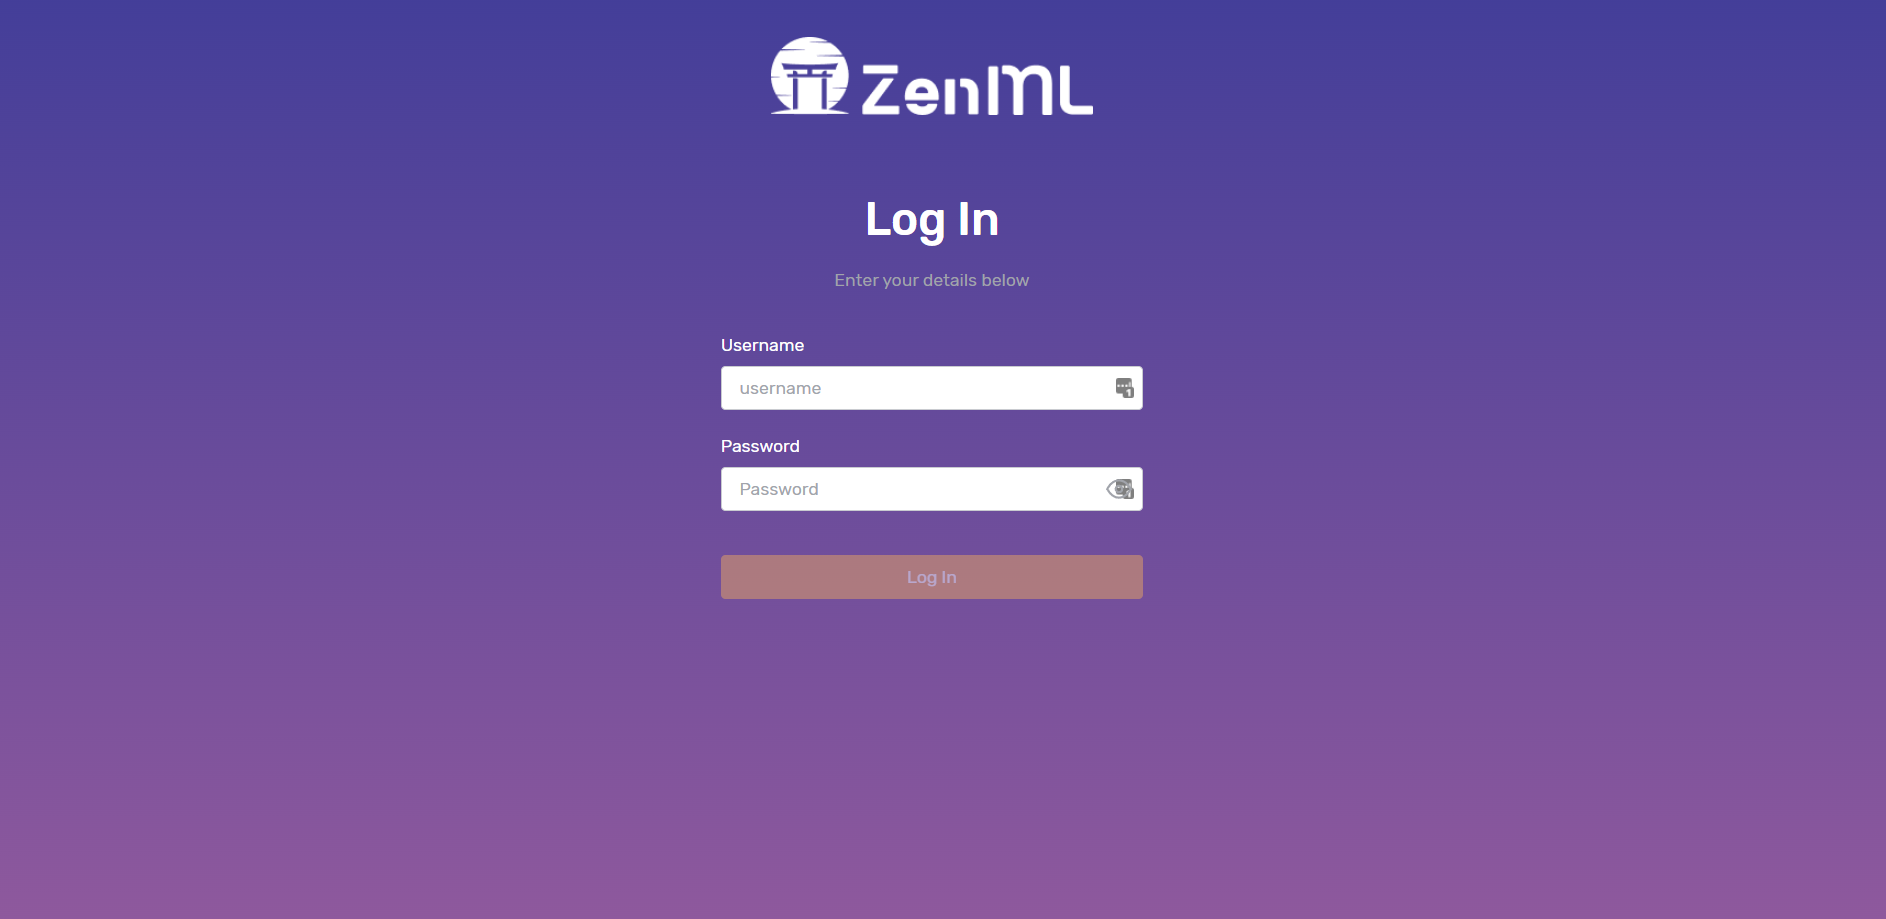
URL (e.g. https://acaaf63af2074as394ab675ee71d85a-1399000d0.us-east-1.elb.amazonaws.com). Visiting this URL on the browser will show you the same ZenML dashboard that you have seen locally, this time over the web. The ZenML Server and the Dashboard are deployed in the same web application and served at this URL. You can use login with your credentials (username and password) to view the dashboard.
If certificates have not been provisioned properly with the deployment, your
browser might ask you to press a button to allow you to see the dashboard. It
is important that you give permission in such a scenario, otherwise it will
render ZenML unusable from the browser.
- A
username: This can be configured but is default by default.
- A
password: This can be configured but is empty by default.
- (Optionally) A
TLS certificate that you can use to connect securely to the deployment (see below).
Connecting to a deployed ZenML Server
Once ZenML is deployed, one or multiple users can connect to with the zenml connect command. If no arguments are supplied, ZenML will attempt to connect to the last ZenML server deployed from the local host using the zenml deploy command:
ZenML Connect: Various options
To connect to a ZenML server, you can either pass the configuration as command line arguments or as a YAML file:
zenml connect --url=https://zenml.example.com:8080 --username=admin --no-verify-ssl
zenml connect --config=/path/to/zenml_server_config.yaml
url:
username:
password:
verify_ssl: |
url: https://ac8ef63af203226194a7725ee71d85a-7635928635.us-east-1.elb.amazonaws.com/zenml
username: admin
password: Pa$$word123
verify_ssl: |
-----BEGIN CERTIFICATE-----
MIIDETCCAfmgAwIBAgIQYUmQg2LR/pHAMZb/vQwwXjANBgkqhkiG9w0BAQsFADAT
MREwDwYDVQQDEwh6ZW5tbC1jYTAeFw0yMjA5MjYxMzI3NDhaFw0yMzA5MjYxMzI3
...
ULnzA0JkRWRnFqH6uXeJo1KAVqtxn1xf8PYxx3NlNDr9wi8KKwARf2lwm6sH4mvq
1aZ/0iYnGKCu7rLJzxeguliMf69E
-----END CERTIFICATE-----
zenml connect --username zenml --password=Pa@#$#word --config=/path/to/zenml_server_config.yaml
ZenML Disconnect: To go back to single-player mode.
To disconnect from the current ZenML server and revert to using the local default database, use the following command:
You can inspect the current ZenML configuration at any given time using the following command:
Example output:
 zenml status
Running without an active repository root.
Connected to a ZenML server: 'https://ac8ef63af203226194a7725ee71d85a-7635928635.us-east-1.elb.amazonaws.com'
The current user is: 'default'
The active project is: 'default' (global)
The active stack is: 'default' (global)
The status of the local dashboard:
              ZenML server 'local'
┏━━━━━━━━━━━━━━━━┯━━━━━━━━━━━━━━━━━━━━━━━━━━━━━┓
┃ URL            │ http://172.17.0.1:9000      ┃
┠────────────────┼─────────────────────────────┨
┃ STATUS         │ ✅                          ┃
┠────────────────┼─────────────────────────────┨
┃ STATUS_MESSAGE │ Docker container is running ┃
┠────────────────┼─────────────────────────────┨
┃ CONNECTED      │                             ┃
┗━━━━━━━━━━━━━━━━┷━━━━━━━━━━━━━━━━━━━━━━━━━━━━━┛