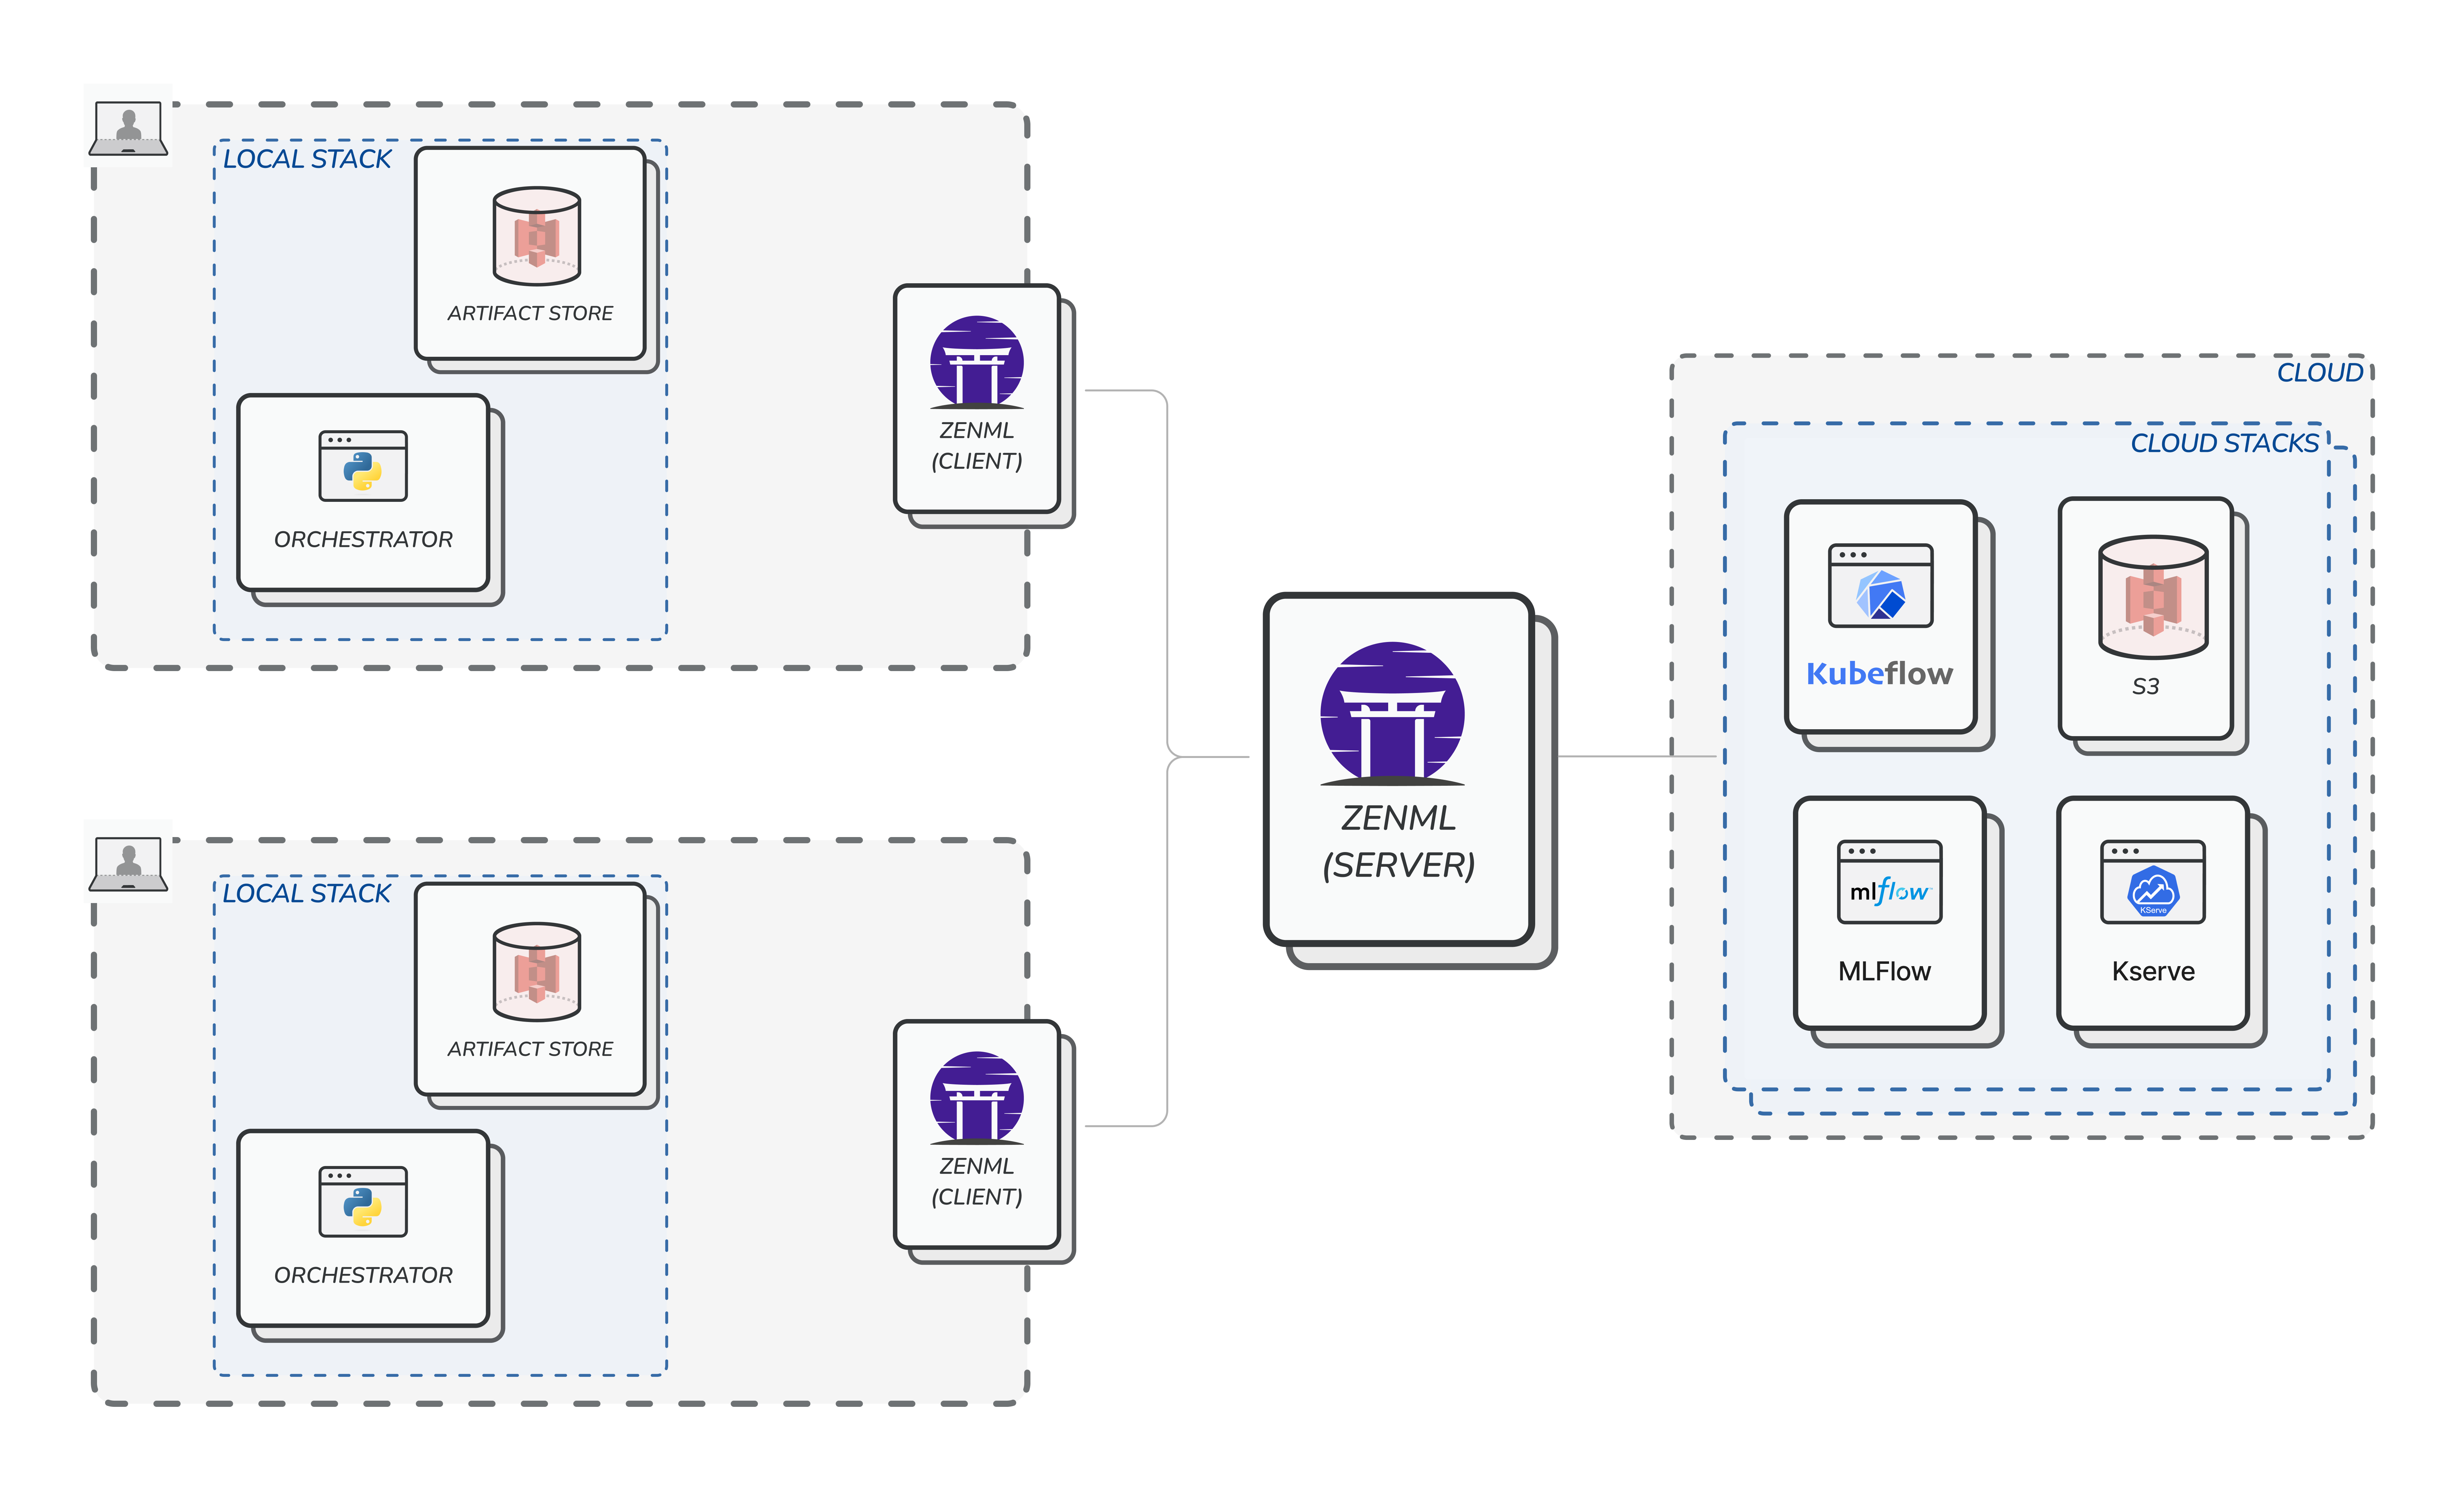
Step 1: Single user working with local stacks
As mentioned before, the most common starting point for most ZenML users would be to locally install it and start managing stacks. We have discussed the nitty-gritty details of such usage previously.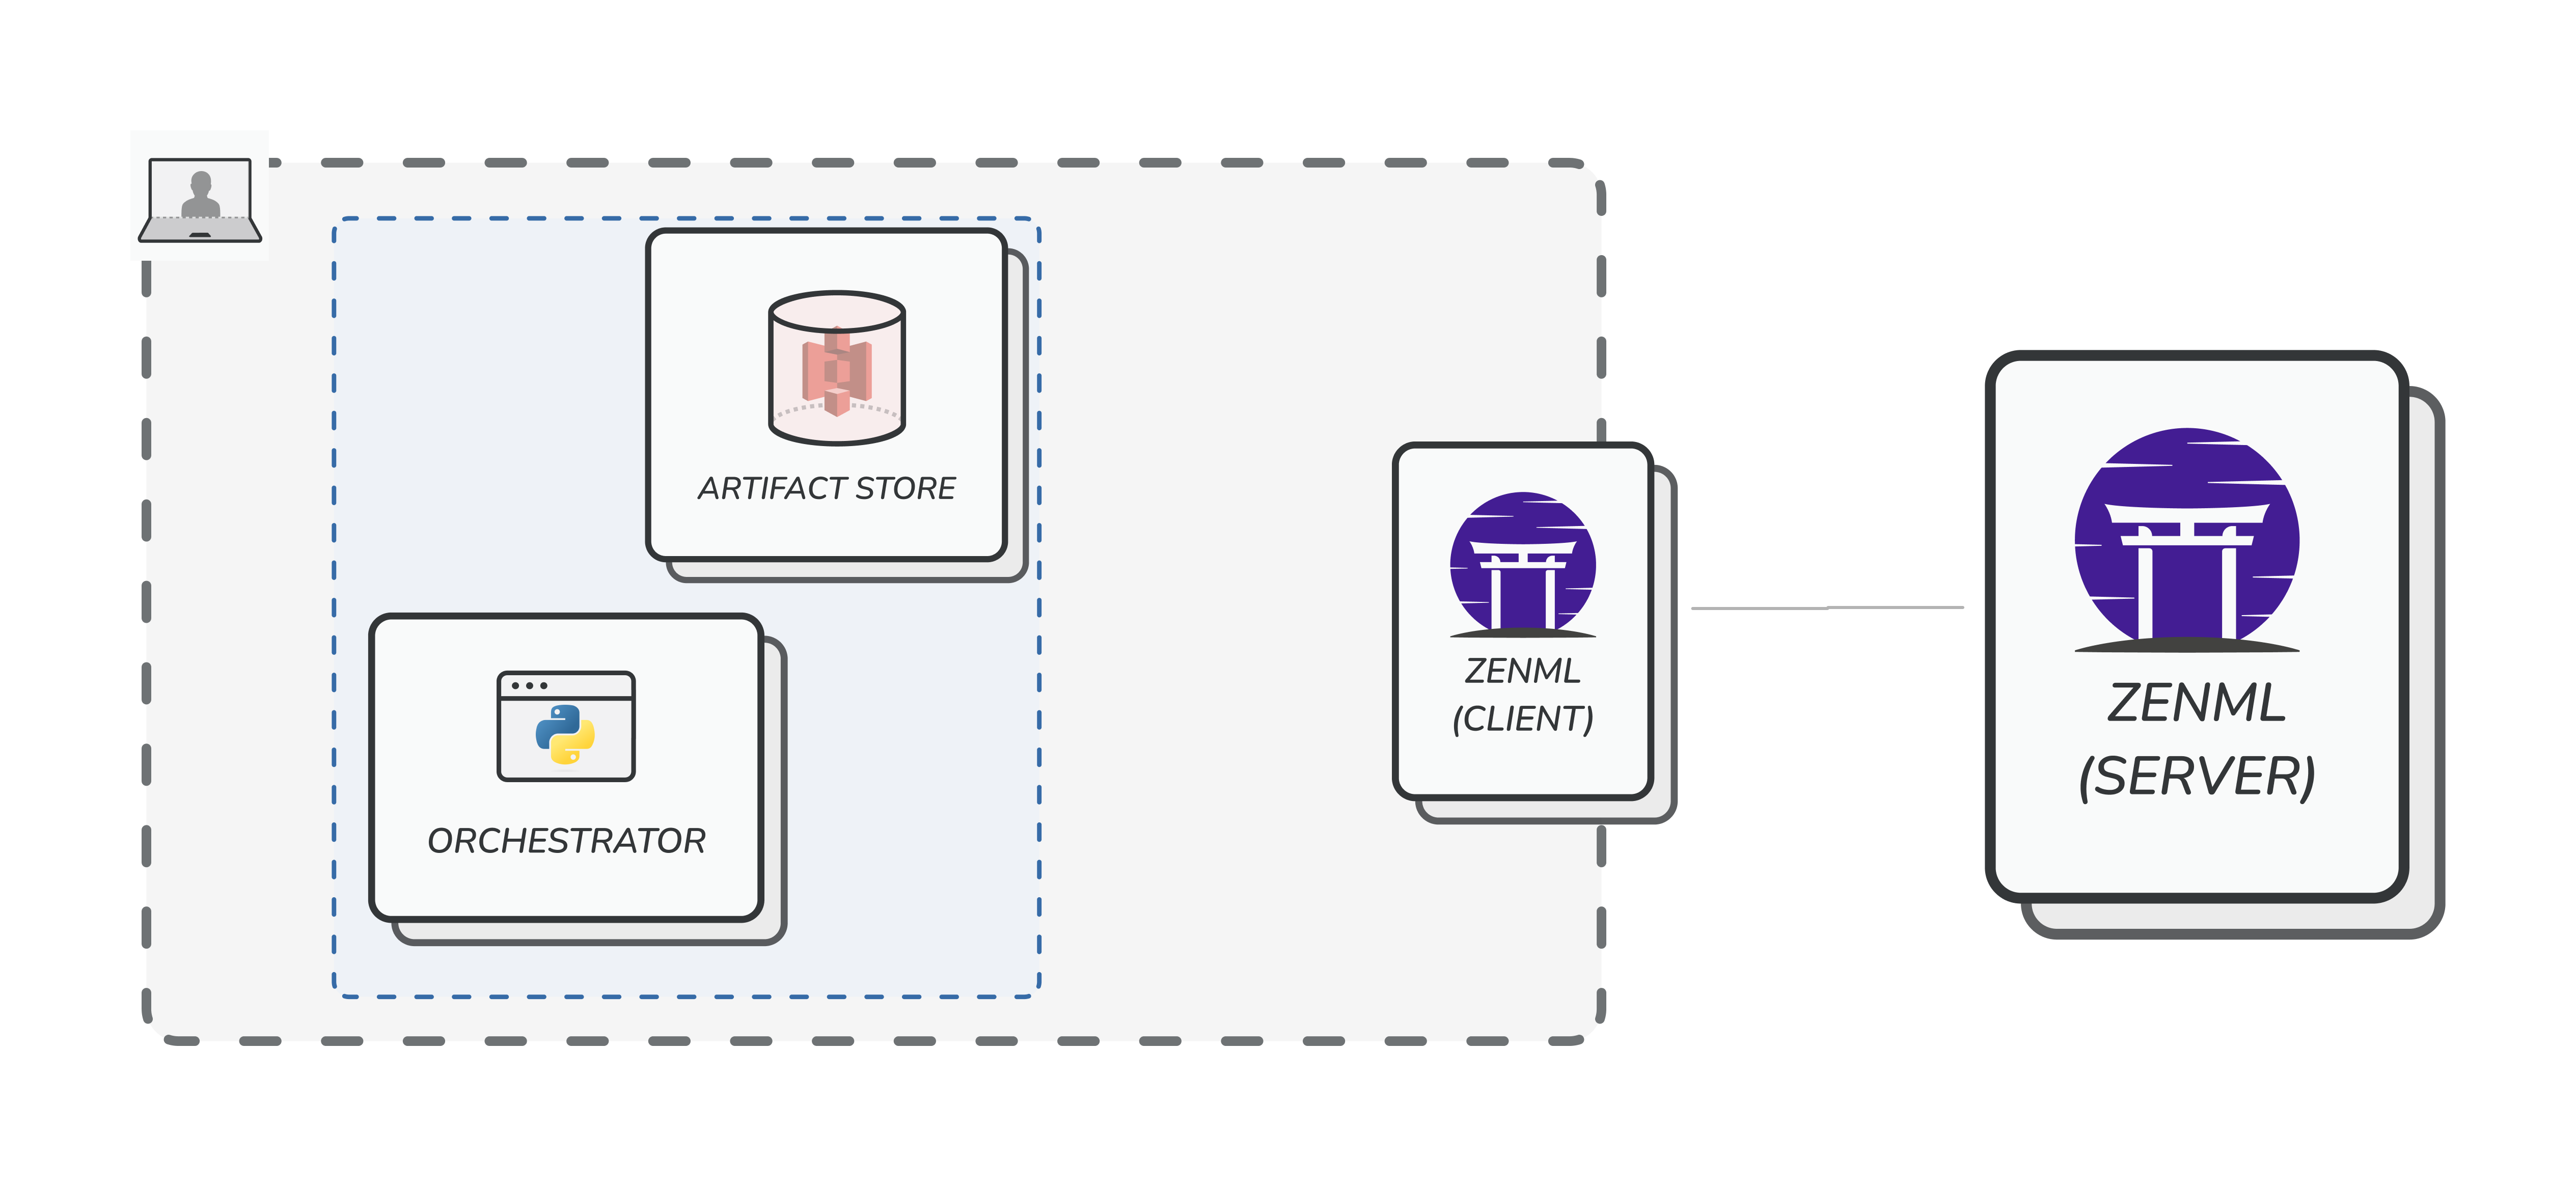
Step 2: Single user working with local and cloud stacks
The next step in the journey is to go to the cloud, and for that you need to deploy ZenML. Don’t worry - we will show an easy way of getting started with this quickly, with little to no knowledge of cloud technologies in the next section. For now, we should understand the consequence of doing such an action. Once ZenML is deployed and the user connects to it remotely, all stacks, pipelines, runs, and other metadata will be centrally tracked in the database that backs the server. The user can still keep using local, non-shared stacks (e.g. the default stack). However, they will notice a significant dropoff in speed of execution of the pipelines because they are now communicating over the internet to a central location.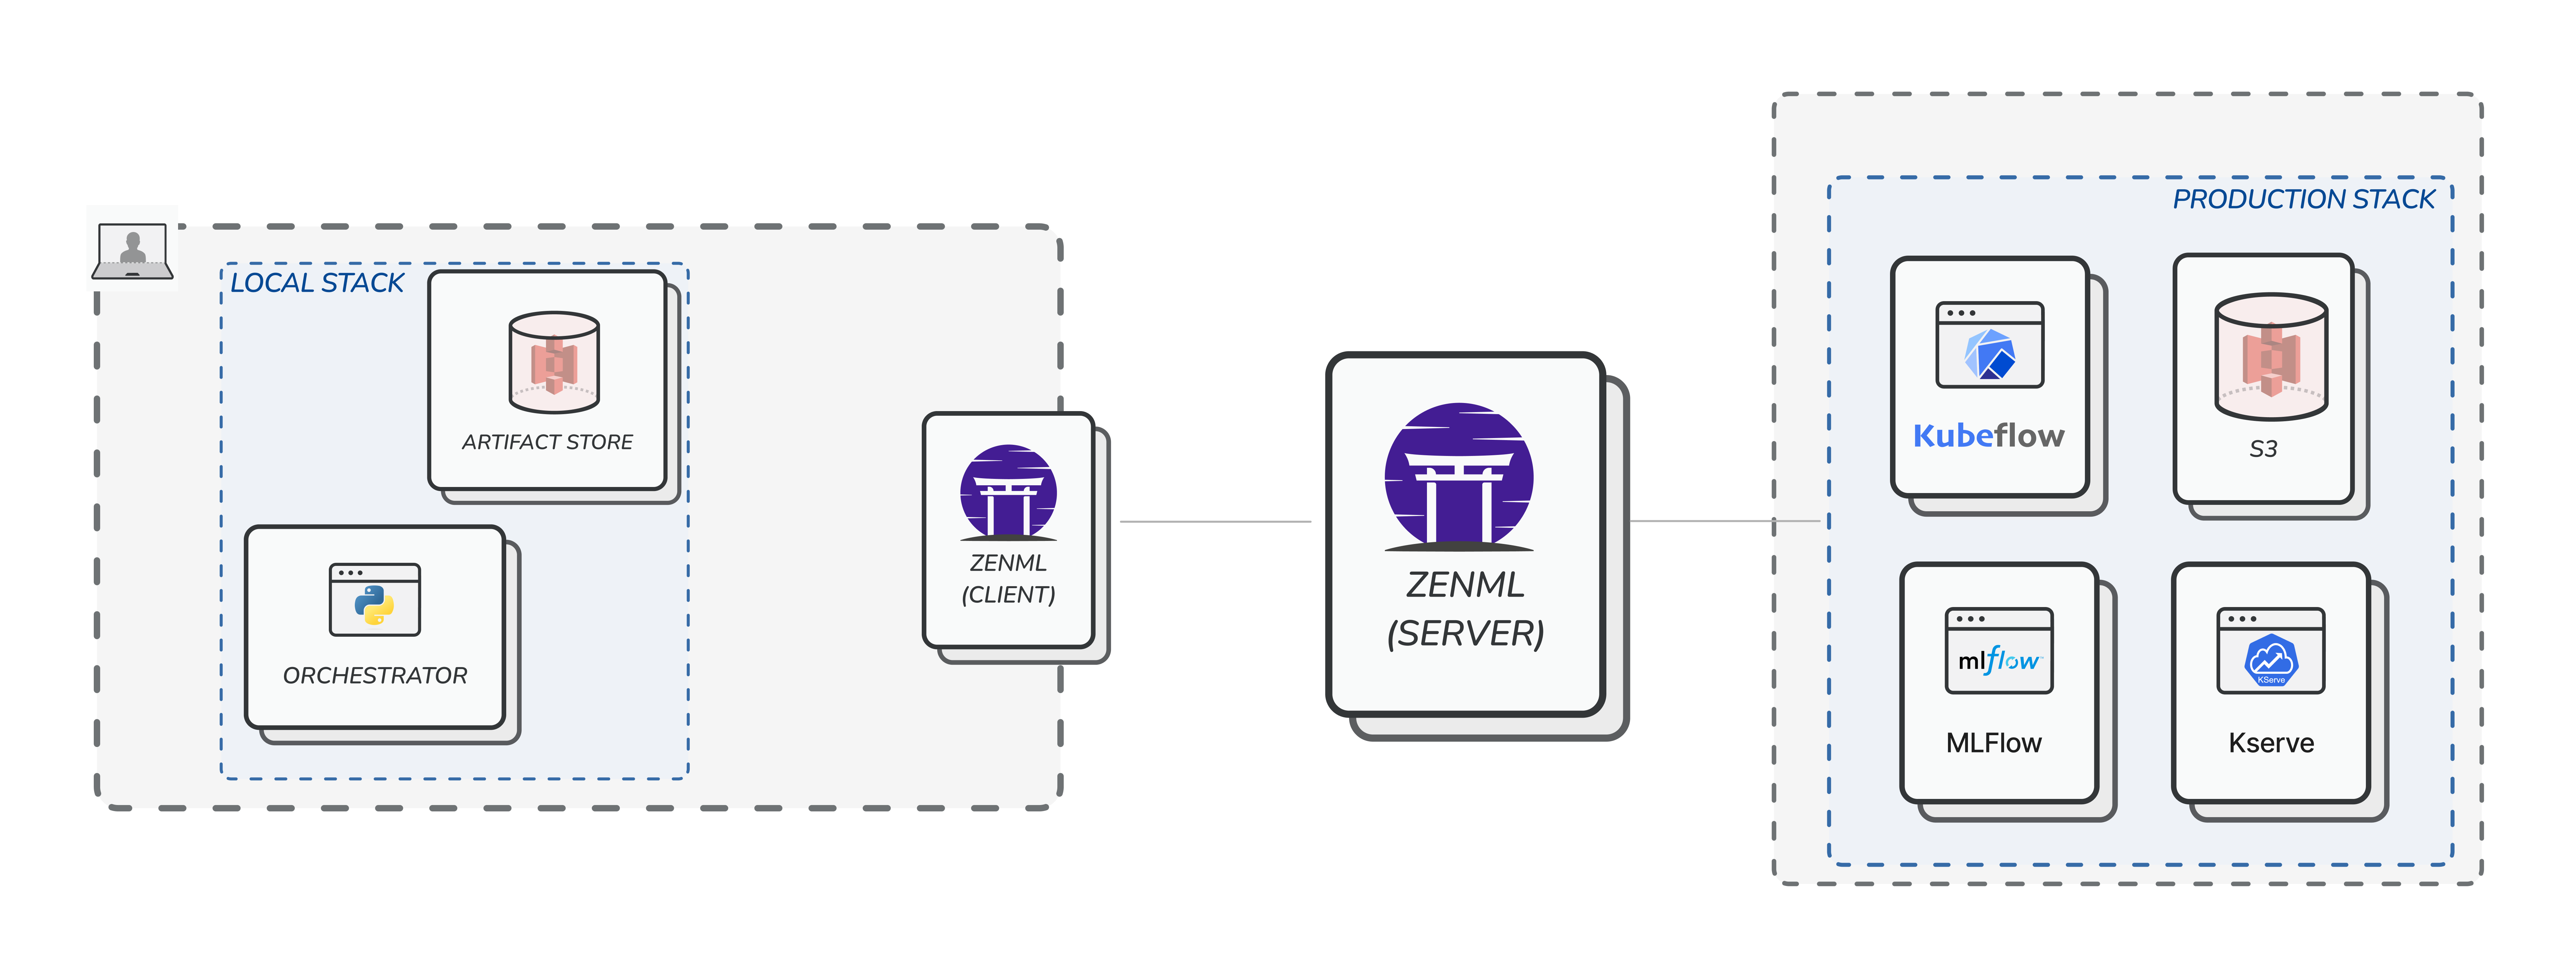
Step 3: Multiple users working with local and cloud stacks
Once the user is ready, they can now go ahead and register so calledcloud (read: non-local) stacks. These stacks consist of stack components that point to tooling infrastructure that is also running on the cloud. A good example of this is a stack that uses the following components:
- KubeflowOrchestrator which orchestrates your ML workflows on Kubeflow Pipelines.
- S3ArtifactStore which can store your artifacts in a S3 storage.
- MLflowExperimentTracker which can track your experiments with MLFlow.
- EvidentlyDataValidator which can help you validate your data with Evidently.